Installation
OneLiveRec is available in three variants: Desktop, Container Image, and CLI. The main functionality of the Desktop is identical to the CLI, except for some UI and System features. The functionality of the Container Image is completely identical to the CLI. You can choose the right variant for your needs.
OneLiveRec Desktop
Section titled “OneLiveRec Desktop”If you have no idea which variant is suited for you or you are not familiar with CLI, we recommend using the Desktop variant for easy setup and use.
-
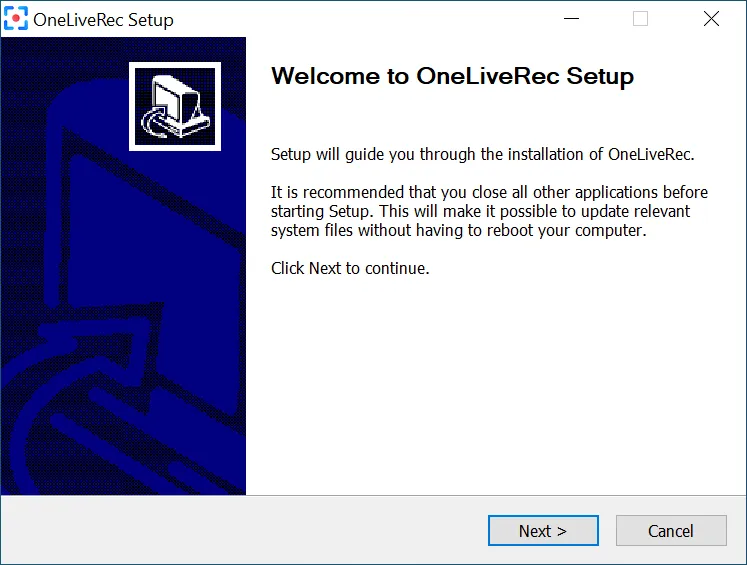
Download the OneLiveRec installer by clicking the button below
Download -
Run the installer, then follow the wizard to finish the installation.
-
Download the OneLiveRec package by running the following command
curl -L -O https://github.com/oneliverec/OneLiveRec/releases/download/v0.6.1/OneLiveRec_0.6.1_amd64.debcurl -L -O https://github.com/oneliverec/OneLiveRec/releases/download/v0.6.1/OneLiveRec_0.6.1_arm64.deb -
Install the package by running the following command
sudo apt install ./OneLiveRec_0.6.1_amd64.debsudo apt install ./OneLiveRec_0.6.1_arm64.deb
-
Download the OneLiveRec package by running the following command
curl -L -O https://github.com/oneliverec/OneLiveRec/releases/download/v0.6.1/OneLiveRec-0.6.1-1.x86_64.rpmcurl -L -O https://github.com/oneliverec/OneLiveRec/releases/download/v0.6.1/OneLiveRec-0.6.1-1.aarch64.rpm -
Install the package by running the following command
sudo dnf install ./OneLiveRec-0.6.1-1.x86_64.rpmsudo dnf install ./OneLiveRec-0.6.1-1.aarch64.rpm
OneLiveRec Container Image
Section titled “OneLiveRec Container Image”You can run the container image by Docker Compose or Docker CLI as follows
-
Create an app directory and change into the directory
mkdir -p ~/orec && cd ~/orec -
Create a file named
compose.yamland paste the following code inname: oneliverecservices:orec:image: ghcr.io/oneliverec/orec:latestrestart: unless-stoppedports:- 5202:5202volumes:- ${PWD}:/app- /etc/machine-id:/etc/machine-id:roenvironment:- TZ=${TZ:-UTC}- PUID=${PUID:-0}- PGID=${PGID:-0}- UMASK=${UMASK:-002}- OREC_USERNAME=${OREC_USERNAME?error}- OREC_PASSWORD=${OREC_PASSWORD?error} -
Create a
.envconfig file by running the following commandcat <<EOF > .envPUID=$(id -u)PGID=$(id -g)UMASK=$(umask)TZ=$(cat /etc/timezone)OREC_USERNAME=usernameOREC_PASSWORD=passwordEOF -
Start up OneLiveRec by running the following command
docker compose up -d -
Open web UI
If you are running OneLiveRec using the default address binding on a machine with a GUI, you can click the link below to open the web UI in the default browser on your local machine.
-
Create an app directory and change into the directory
mkdir -p ~/orec && cd ~/orec -
Run OneLiveRec container by running the following command
You can replace the default exposed port
5202with a port according to your needsdocker run \-d \-v "$PWD:/app" \-v /etc/machine-id:/etc/machine-id:ro \-p 5202:5202 \-e PUID=$(id -u) \-e PGID=$(id -g) \-e UMASK=$(umask) \-e TZ=$(cat /etc/timezone) \-e OREC_USERNAME=username\-e OREC_PASSWORD=password\--name orec \--restart unless-stopped \ghcr.io/oneliverec/orec:latest -
Open web UI
If you are running OneLiveRec using the default address binding on a machine with a GUI, you can click the link below to open the web UI in the default browser on your local machine.
OneLiveRec CLI
Section titled “OneLiveRec CLI”The CLI variant is portable, so you just need to download the archive and extract the files somewhere, then run the executable.
-
Download archive
Invoke-WebRequest -Uri https://github.com/oneliverec/OneLiveRec/releases/download/v0.6.1/orec-0.6.1-x86_64-pc-windows-msvc.zip -OutFile orec-0.6.1-x86_64-pc-windows-msvc.zip -
Extract files
Expand-Archive -LiteralPath orec-0.6.1-x86_64-pc-windows-msvc.zip -DestinationPath orec-0.6.1-x86_64-pc-windows-msvcSet-Location orec-0.6.1-x86_64-pc-windows-msvc -
Run OneLiveRec
.\orec.exe run -uusername-ppassword -
Open web UI
If you are running OneLiveRec using the default address binding on a machine with a GUI, you can click the link below to open the web UI in the default browser on your local machine.
-
Download archive
curl -L -O https://github.com/oneliverec/OneLiveRec/releases/download/v0.6.1/orec-0.6.1-x86_64-unknown-linux-gnu.tar.xzcurl -L -O https://github.com/oneliverec/OneLiveRec/releases/download/v0.6.1/orec-0.6.1-aarch64-unknown-linux-gnu.tar.xz -
Extract files
tar xvf orec-0.6.1-x86_64-unknown-linux-gnu.tar.xz && cd orec-0.6.1-x86_64-unknown-linux-gnutar xvf orec-0.6.1-aarch64-unknown-linux-gnu.tar.xz && cd orec-0.6.1-aarch64-unknown-linux-gnu -
Run OneLiveRec
./orec run -uusername-ppassword -
Open web UI
If you are running OneLiveRec using the default address binding on a machine with a GUI, you can click the link below to open the web UI in the default browser on your local machine.