安装
OneLiveRec 有三种版本:桌面版、容器镜像和命令行版。 桌面版的主要功能与命令行版相同,但部分 UI 和系统功能有所不同。 容器镜像的功能与命令行版完全相同。 根据自己的需求选择合适的版本。
OneLiveRec 桌面版
Section titled “OneLiveRec 桌面版”如果不确定哪种版本适合,或者不熟悉命令行,建议用更容易安装和使用的桌面版。
-
点击下方按钮下载 OneLiveRec 安装程序
下载 -
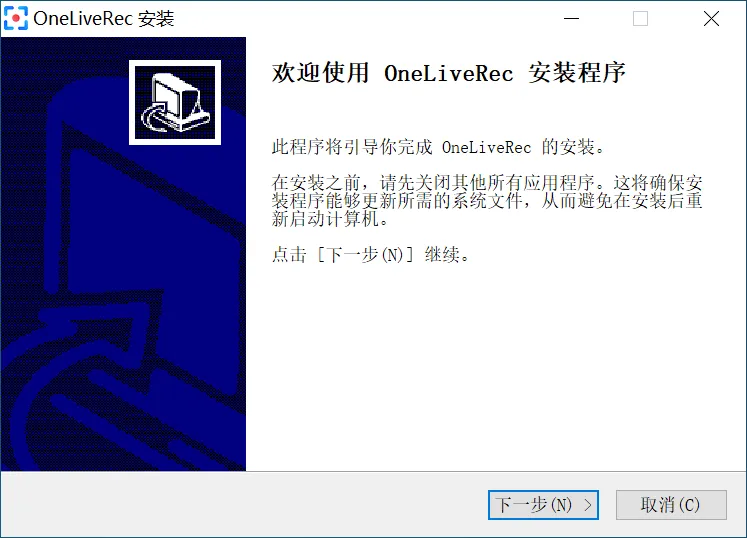
运行安装程序,然后按照向导完成安装。

-
运行以下命令下载 OneLiveRec 软件包
curl -L -O https://github.com/oneliverec/OneLiveRec/releases/download/v0.5.2/OneLiveRec_0.5.2_amd64.debcurl -L -O https://github.com/oneliverec/OneLiveRec/releases/download/v0.5.2/OneLiveRec_0.5.2_arm64.deb -
运行以下命令安装软件包
sudo apt install ./OneLiveRec_0.5.2_amd64.debsudo apt install ./OneLiveRec_0.5.2_arm64.deb
-
运行以下命令下载 OneLiveRec 软件包
curl -L -O https://github.com/oneliverec/OneLiveRec/releases/download/v0.5.2/OneLiveRec-0.5.2-1.x86_64.rpmcurl -L -O https://github.com/oneliverec/OneLiveRec/releases/download/v0.5.2/OneLiveRec-0.5.2-1.aarch64.rpm -
运行以下命令安装软件包
sudo dnf install ./OneLiveRec-0.5.2-1.x86_64.rpmsudo dnf install ./OneLiveRec-0.5.2-1.aarch64.rpm
OneLiveRec 容器镜像
Section titled “OneLiveRec 容器镜像”可以按照以下方式通过 Docker Compose 或 Docker CLI 运行容器镜像
-
创建一个应用程序目录并切换到该目录
mkdir -p ~/orec && cd ~/orec -
创建一个名为
compose.yaml的文件,并粘贴以下代码。name: oneliverecservices:orec:image: ghcr.io/oneliverec/orec:latestrestart: unless-stoppedports:- '127.0.0.1:5202:5202'volumes:- ${PWD}:/app- /etc/machine-id:/etc/machine-id:roenvironment:- TZ=${TZ:-UTC}- PUID=${PUID:-0}- PGID=${PGID:-0}- UMASK=${UMASK:-002}- OREC_USERNAME=${OREC_USERNAME?error}- OREC_PASSWORD=${OREC_PASSWORD?error}healthcheck:test: curl -f http://${OREC_USERNAME}:${OREC_PASSWORD}@localhost:5202/health || exit 1retries: 3timeout: 10sinterval: 1mstart_period: 1sstart_interval: 3scaddy:image: caddy:latestrestart: unless-stoppedports:- '80:80'- '443:443'volumes:- ./Caddyfile:/etc/caddy/Caddyfile- caddy_data:/data- caddy_config:/configenvironment:OREC_HOSTS: '${OREC_HOSTS?error}'depends_on:orec:restart: truecondition: service_healthyvolumes:caddy_data:caddy_config: -
创建一个名为
Caddyfile的文件,并粘贴以下内容。(redirect) {@http {protocol http}redir @http https://{host}{uri}}{$OREC_HOSTS} {reverse_proxy orec:5202} -
通过运行以下命令创建
.env配置文件将
example.com替换为你的主机名(主机名之间用逗号分隔)cat <<EOF > .envPUID=$(id -u)PGID=$(id -g)UMASK=$(umask)TZ=$(cat /etc/timezone)OREC_HOSTS=orec.localhost, example.comOREC_USERNAME=用户OREC_PASSWORD=密码EOF -
运行以下命令启动 OneLiveRec
docker compose up -d -
打开网页界面
如果是在有图形界面的电脑上使用默认地址绑定运行 OneLiveRec,则可以点击以下链接在本地电脑上的默认浏览器中打开网页界面。
-
创建一个应用程序目录并切换到该目录
mkdir -p ~/orec && cd ~/orec -
创建一个名为
compose.yaml的文件,并粘贴以下代码。name: oneliverecservices:orec:image: ghcr.io/oneliverec/orec:latestrestart: unless-stoppedports:- 5202:5202volumes:- ${PWD}:/app- /etc/machine-id:/etc/machine-id:roenvironment:- TZ=${TZ:-UTC}- PUID=${PUID:-0}- PGID=${PGID:-0}- UMASK=${UMASK:-002}- OREC_USERNAME=${OREC_USERNAME?error}- OREC_PASSWORD=${OREC_PASSWORD?error} -
通过运行以下命令创建
.env配置文件cat <<EOF > .envPUID=$(id -u)PGID=$(id -g)UMASK=$(umask)TZ=$(cat /etc/timezone)OREC_USERNAME=用户OREC_PASSWORD=密码EOF -
运行以下命令启动 OneLiveRec
docker compose up -d -
打开网页界面
如果是在有图形界面的电脑上使用默认地址绑定运行 OneLiveRec,则可以点击以下链接在本地电脑上的默认浏览器中打开网页界面。
-
创建一个应用程序目录并切换到该目录
mkdir -p ~/orec && cd ~/orec -
运行以下命令运行 OneLiveRec 容器
可以根据需求将默认公开端口
5202替换为其他端口docker run \-d \-v "$PWD:/app" \-v /etc/machine-id:/etc/machine-id:ro \-p 5202:5202 \-e PUID=$(id -u) \-e PGID=$(id -g) \-e UMASK=$(umask) \-e TZ=$(cat /etc/timezone) \-e OREC_USERNAME=用户\-e OREC_PASSWORD=密码\--name orec \--restart unless-stopped \ghcr.io/oneliverec/orec:latest -
打开网页界面
如果是在有图形界面的电脑上使用默认地址绑定运行 OneLiveRec,则可以点击以下链接在本地电脑上的默认浏览器中打开网页界面。
OneLiveRec 命令行版
Section titled “OneLiveRec 命令行版”命令行版本是绿色的,只需下载压缩包并解压到某个位置,然后运行可执行文件即可。
-
下载压缩包
Invoke-WebRequest -Uri https://github.com/oneliverec/OneLiveRec/releases/download/v0.5.2/orec-0.5.2-x86_64-pc-windows-msvc.zip -OutFile orec-0.5.2-x86_64-pc-windows-msvc.zip -
解压文件
Expand-Archive -LiteralPath orec-0.5.2-x86_64-pc-windows-msvc.zip -DestinationPath orec-0.5.2-x86_64-pc-windows-msvcSet-Location orec-0.5.2-x86_64-pc-windows-msvc -
运行程序
.\orec.exe run -u用户-p密码 -
打开网页界面
如果是在有图形界面的电脑上使用默认地址绑定运行 OneLiveRec,则可以点击以下链接在本地电脑上的默认浏览器中打开网页界面。
-
下载压缩包
curl -L -O https://github.com/oneliverec/OneLiveRec/releases/download/v0.5.2/orec-0.5.2-x86_64-unknown-linux-gnu.tar.xzcurl -L -O https://github.com/oneliverec/OneLiveRec/releases/download/v0.5.2/orec-0.5.2-aarch64-unknown-linux-gnu.tar.xz -
解压文件
tar xvf orec-0.5.2-x86_64-unknown-linux-gnu.tar.xz && cd orec-0.5.2-x86_64-unknown-linux-gnutar xvf orec-0.5.2-aarch64-unknown-linux-gnu.tar.xz && cd orec-0.5.2-aarch64-unknown-linux-gnu -
运行程序
./orec run -u用户-p密码 -
打开网页界面
如果是在有图形界面的电脑上使用默认地址绑定运行 OneLiveRec,则可以点击以下链接在本地电脑上的默认浏览器中打开网页界面。